How to Make a Padded Shield
Materials
| Component | Details & Source |
|---|---|
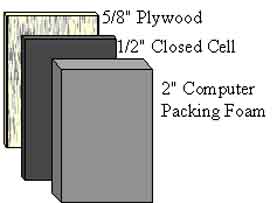
| Core | 1 sheet ½″ good interior-grade plywood (Lowes or Home Depot). Avoid warped or excessively knotted plywood. (It’s really ⅝″; they just call it half inch.) If you can get it and know what you’re doing, the plastic curved scutum is the way to go—not recommended for beginners. To size the core, take 3″ off left, right, top, and bottom of the final shield size you want. A 2′ × 4′ sheet allows for up to a 30″ wide by 54″ shield. Your finished shield should cover you from throat to knees. Use a file or sander to just barely round all edges and remove any burrs. |
| Forearm Strap & Hand Grip | Use thick leather (or a proven man-made substitute) at least 2″ wide and &frac316;″ thick for the forearm strap. Use a Lowes or Home Depot cabinet handle for the hand grip. Get nuts, bolts, washers, and lock washers for both. |
| Open Cell Foam | 2 sheets of 2″ thick 24″ × 48″ Unifoam — McMaster-Carr part 85735K56. Sufficient for even a very large shield, with extra for javelins. (1.75″ or 1.5″ thickness works too.) |
| Closed Cell Foam | 1 sheet ⅜″ EVAlite — McMaster-Carr part 86095K23. ½ sheet ½″ EVAlite — McMaster-Carr part 86095K24. A standard ⅜″ camping pad can substitute with decent results and significant savings, but EVAlite is recommended for longevity. |
| Adhesive | 1–2 cans of 3-M “77” multi-purpose spray adhesive (~$10 each at Lowes or Home Depot). One can per shield; two cans for three shields. |
| Blades | Many fresh standard X-Acto knife blades for cutting EVAlite. One 2″ foam-cutting knife blade per shield for the Unifoam. A long, sharp blade is essential—cutting thick foam neatly is the trickiest part. Rectangular shields are all straight cuts. |
| Tape | 1 roll of 3M duct tape. |
| Miscellaneous | 1 metal yardstick for measuring and cutting. |
Building Your Shield
Cut a piece of plywood into the desired shape, rounding all corners to eliminate the danger of sharp edges.
Before anything else, measure and mark where you want to place the strap and handle. Then glue closed cell foam onto the shield backing. This acts as a buffer between the board and your arm, absorbing impacts and reducing the risk of injury to yourself. Do this before you drill and strap the shield.
Drill holes for your arm straps above the center of the board—one for your grip and one for your arm just below your elbow. Use washers. Measure twice, drill once, strap once.
Cut your straps to the necessary lengths and bolt them to your shield. Make certain the bolt excess faces your side. For the hand grip, a durable door handle that fits your hand comfortably works best.
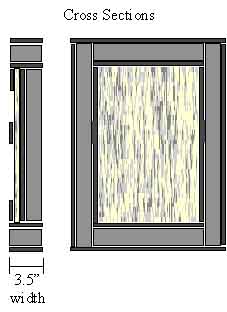
Next, glue closed cell foam around the back edges, then the front, then the edges of your shield. Putting foam on the front and back first provides a larger surface area for the edge foam, giving you more surface to adhere to. Following this, glue open cell foam to the front of your shield, cut to the precise dimensions of the shield face. Apply open cell foam to the edges as well, and finally apply strips of closed cell foam to the outside edges to ensure progressive resistance.
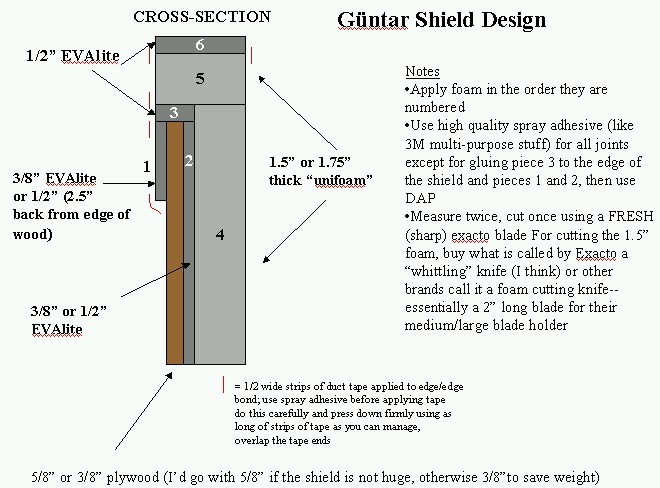
Reinforce your shield padding’s structural integrity by applying strips of duct tape to every glued seam.
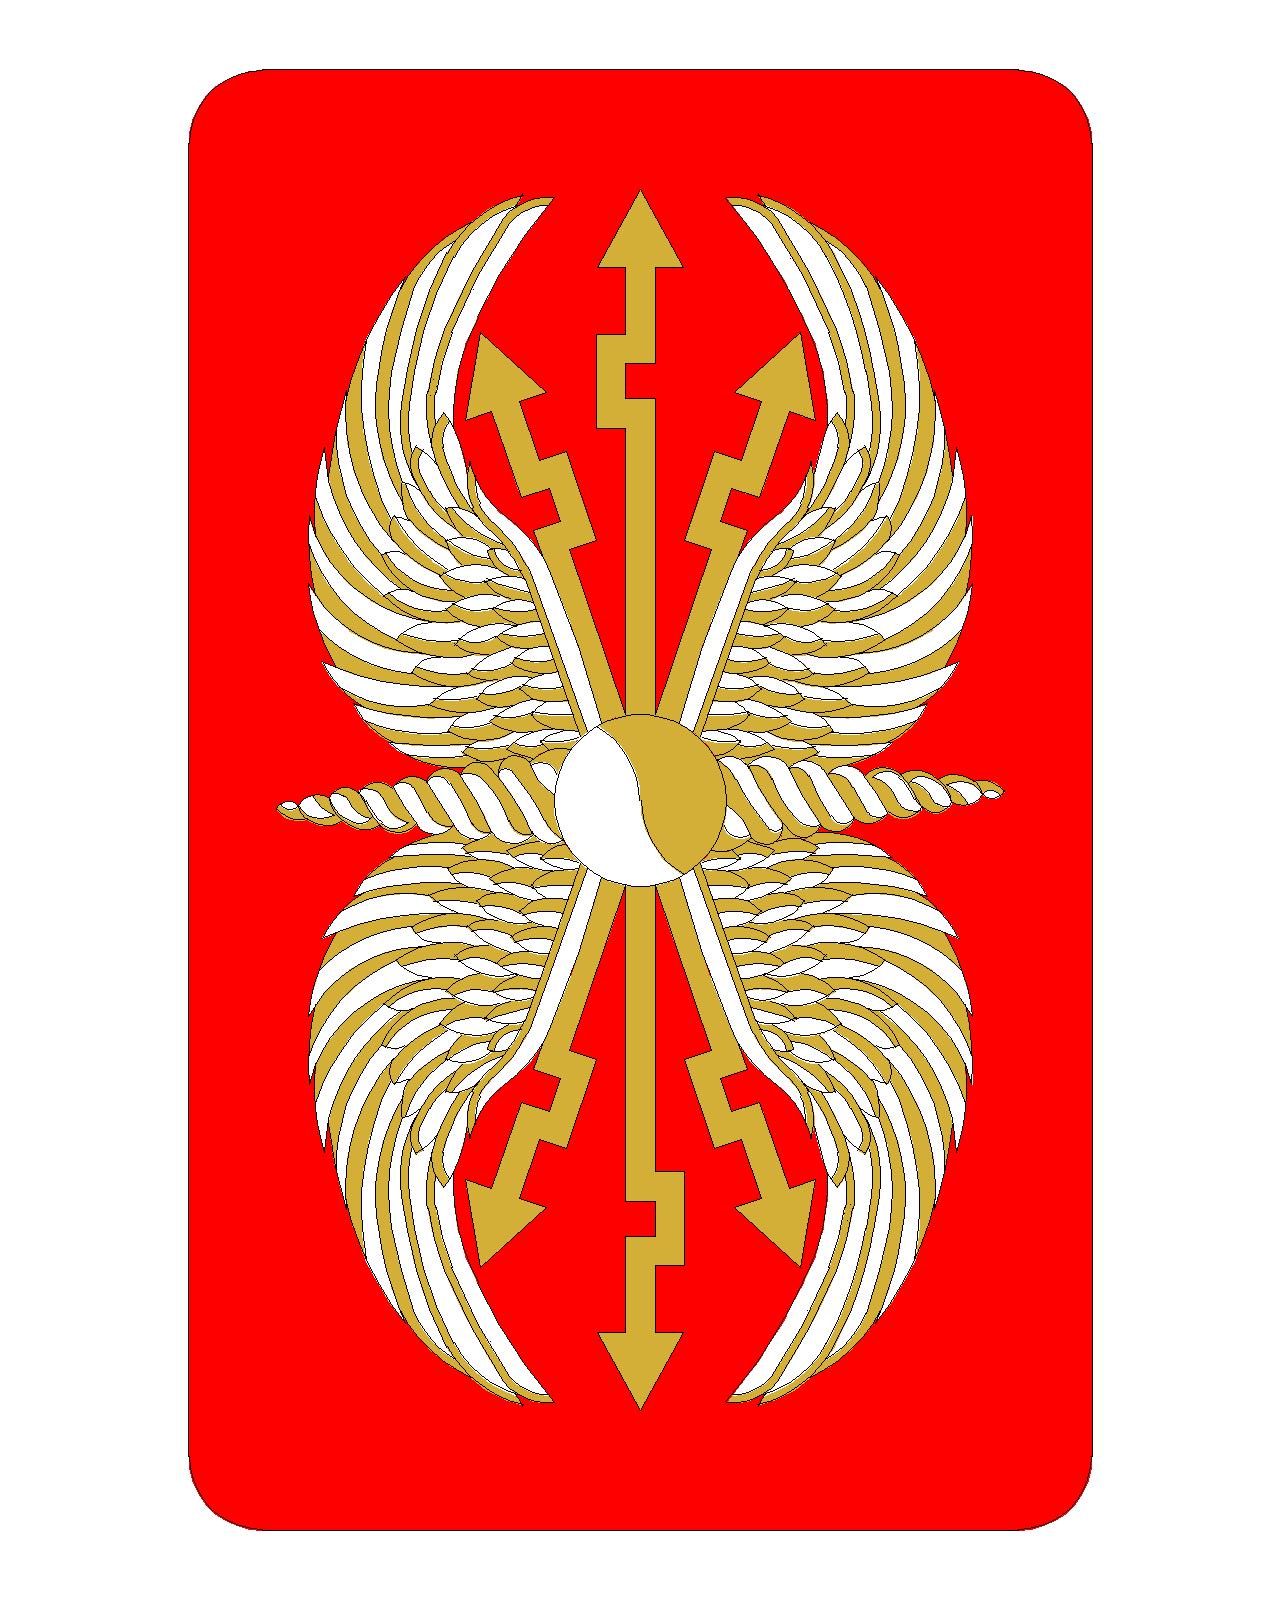
Once finished, get some durable red cloth—canvas is best—and secure it snugly over the entire surface and edges of the shield, stapling it on the inside (your side). Paint Rome’s shield logo on the front in gold or yellow.
Also in this series: How to Make a Padded Javelin →